Effortlessly build and customize your contacts for contractors list with the Add Contact feature.
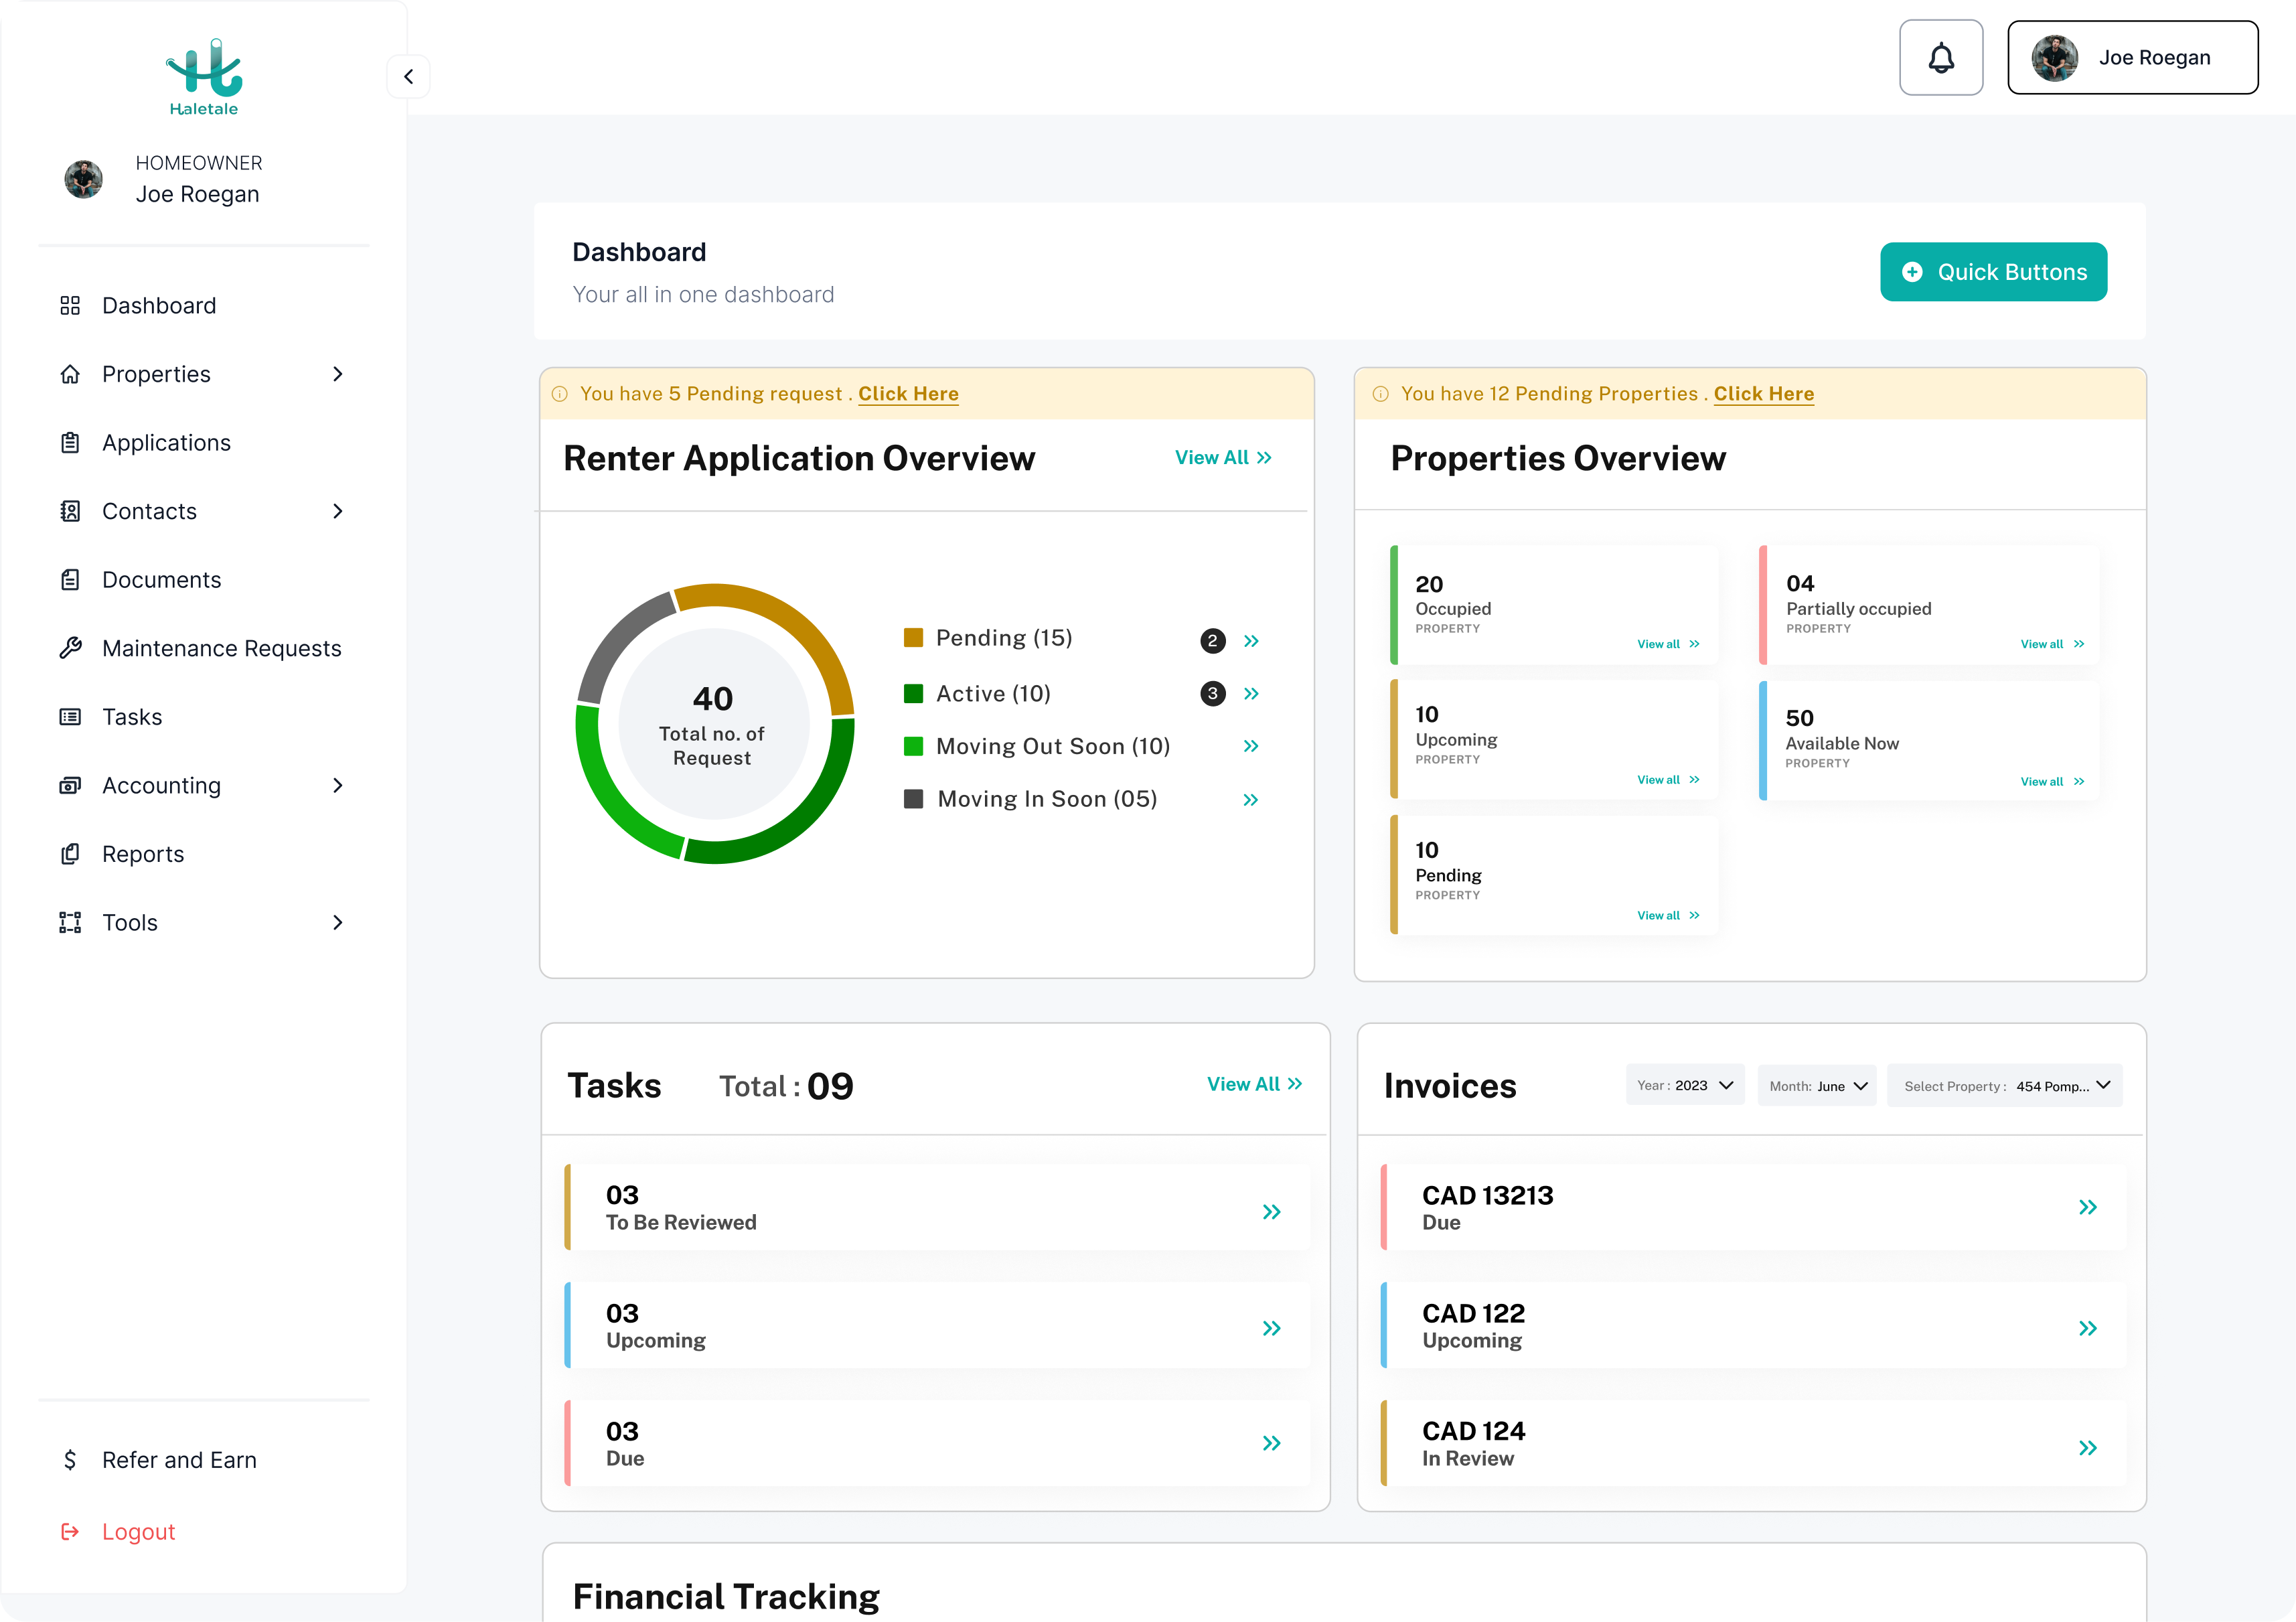
- In the Dashboard click on the left sidebar or click the “Quick buttons”
- Within the left side bar click on “Contacts”

3. Click on “Homeowner”

- To add “Homeowner” to contact, Click “Add Contact”

- Fill the following

- Add Contact: Begin by adding a new contact
- First Name: Enter the first name of the contact.
- Last Name: Enter the last name of the contact.
- Type of Contact: Choose the type of contact. (Homeowner)

- Phone Number: Enter the phone number of the contact.
- Email Address: Enter the email address of the contact.
- Non-Resident Tax Account Number: If applicable, enter the tax account number for non-resident contacts.
- Payment Method: Choose the payment method. (Note: ‘0’ might indicate a specific payment method)
- Payment Info: Enter any relevant payment information for the contact.
- Homeowner Address: Search and enter the homeowner’s address associated with the contact.
- Add: Confirm and add the contact with the provided information.
- Cancel: If needed, you can cancel the process.